

DevOps Jenkins CI/CD Project with Docker and GitHub Integration
# Day 24 Task # Trainwithshubam # 90 Days of DevOps # Complete DevOps Project


Prerequisites for Project.
Two EC2 Free tier Instances (One for Jenkins-Master and Jenkins-Agent for Docker) (Note: You can do it in one Instance as well but I am using two instances for better performance as my Instances are of low configuration and with this, you can cover jenkins master salve concept as well.)
GitHub Repository
Let's Start the Project.
Launching an EC2 Instance and Installing Jenkins While Launching EC2.
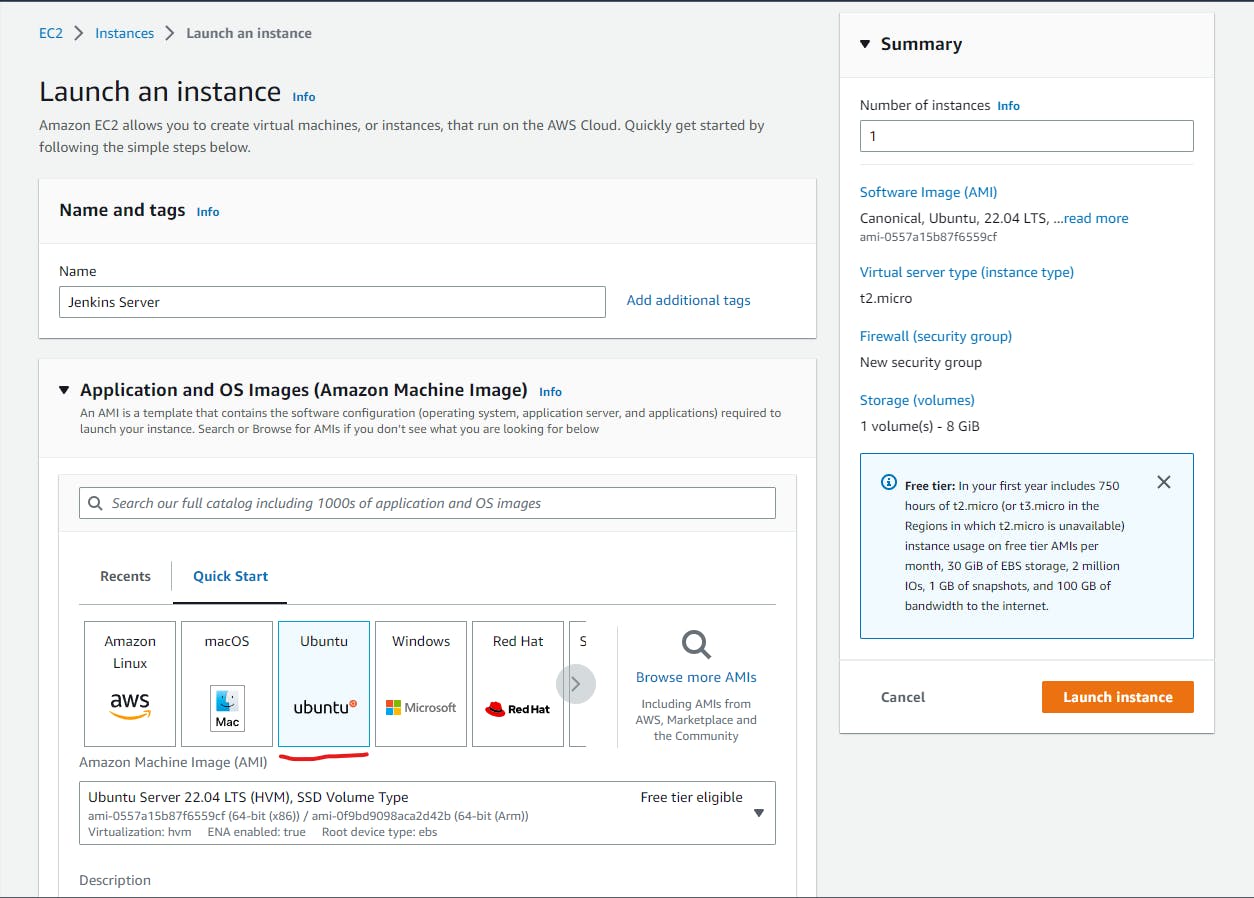
Goto AWS EC2 Service and Select Launch instances.
Select Ubuntu Free Tier AMI.
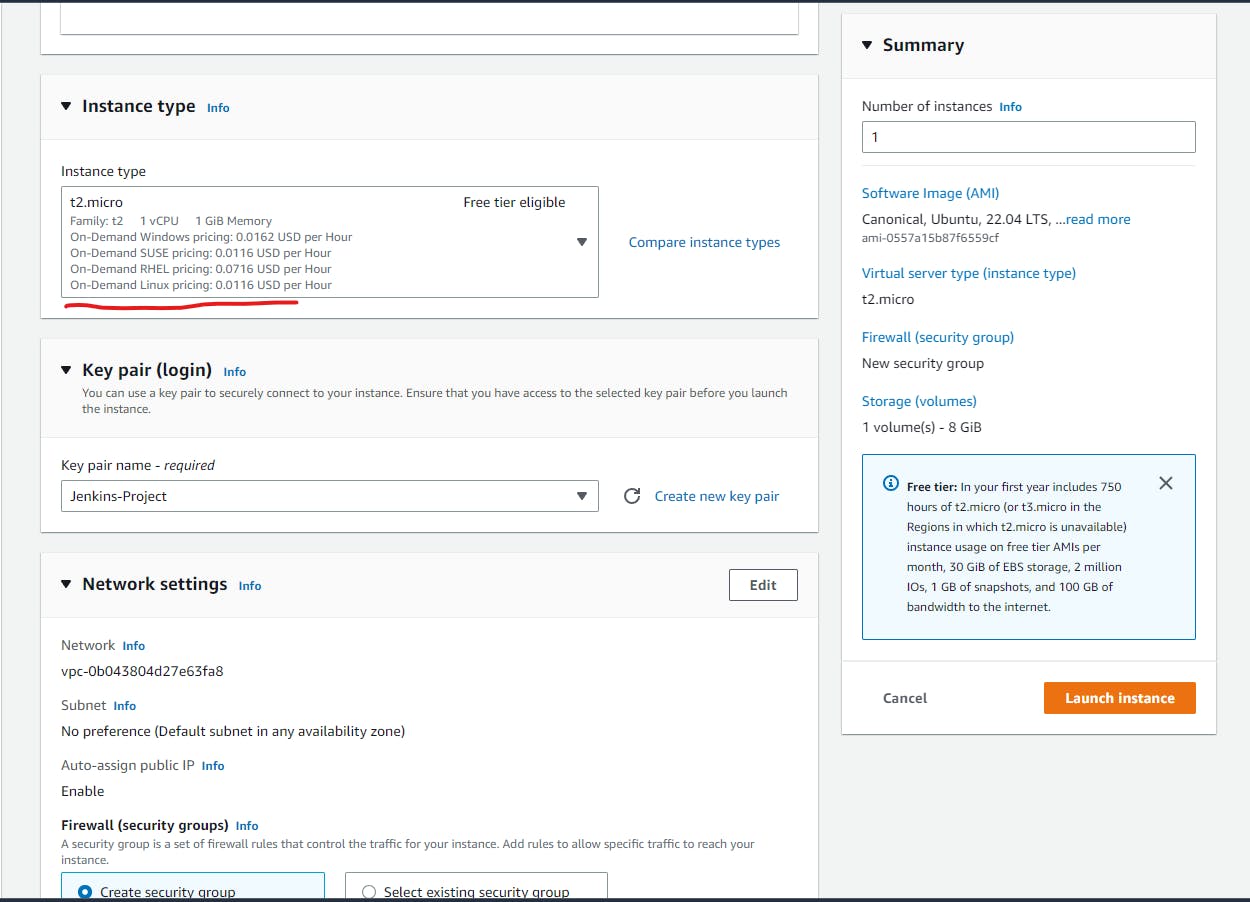
Select t2.micro in the EC2 Instance type.
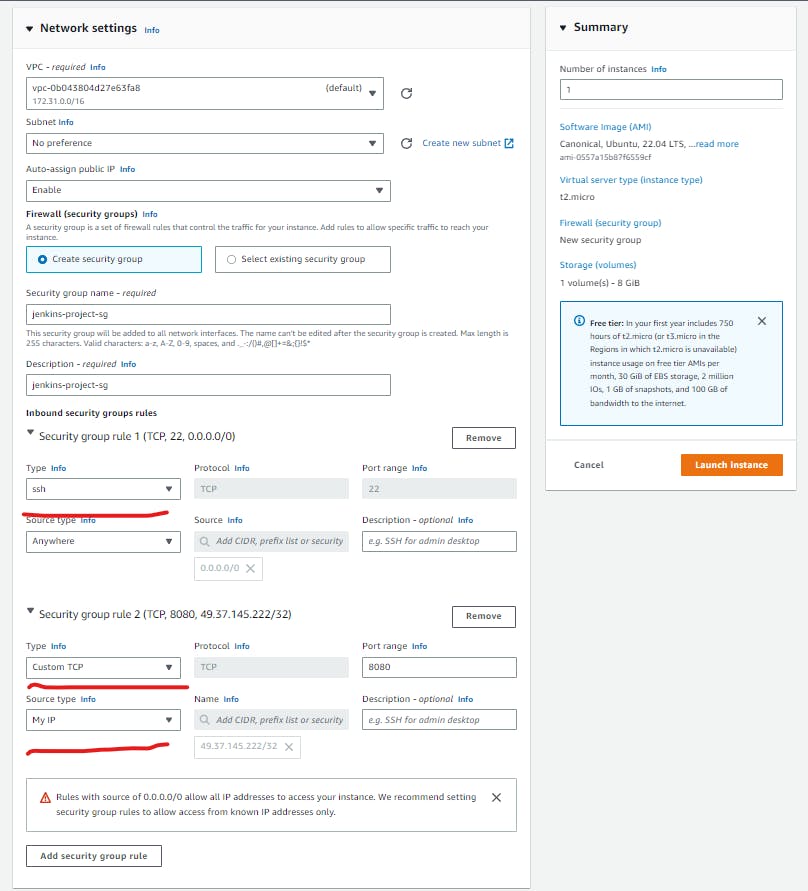
In Network, settings create a security group and open port 22 for ssh and port 8080 for Jenkins.
In Advanced details go to User data and add the following script. (Note: Check if Jenkins is installed or not if not try to install it manually).
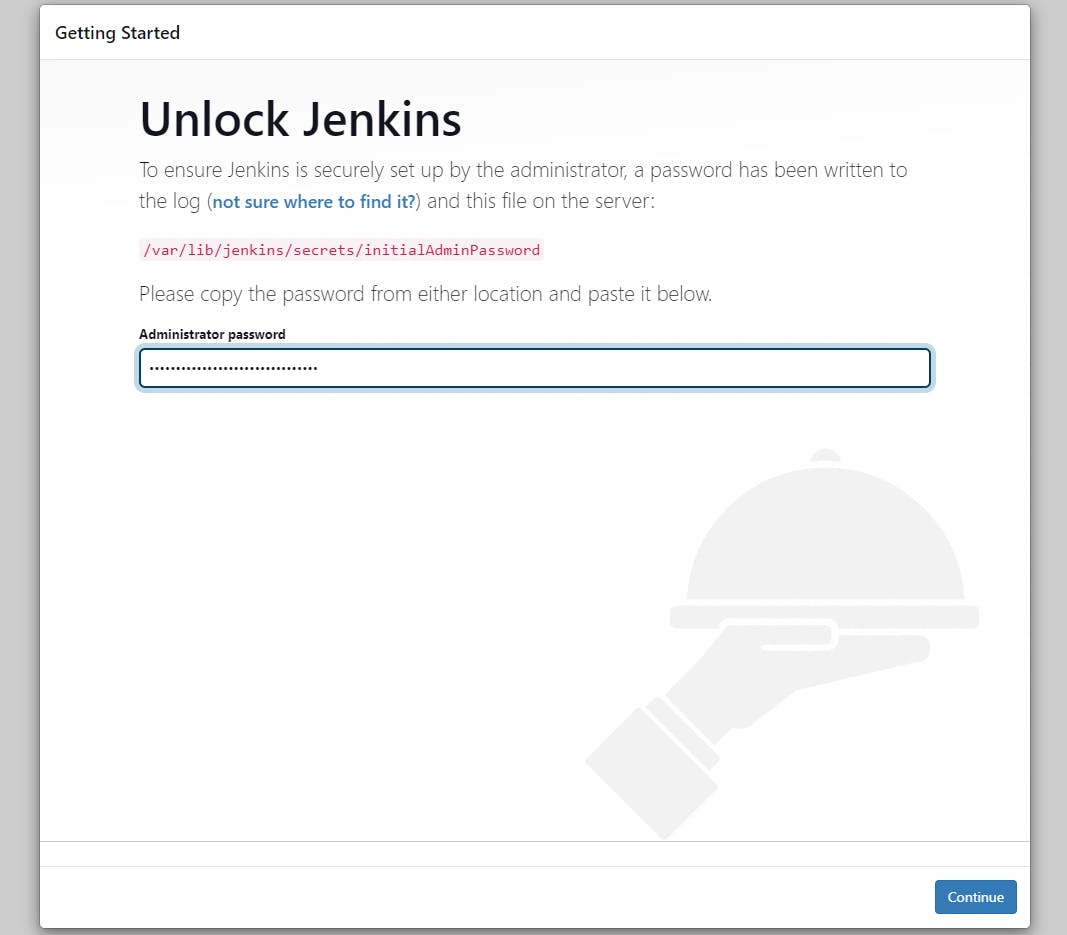
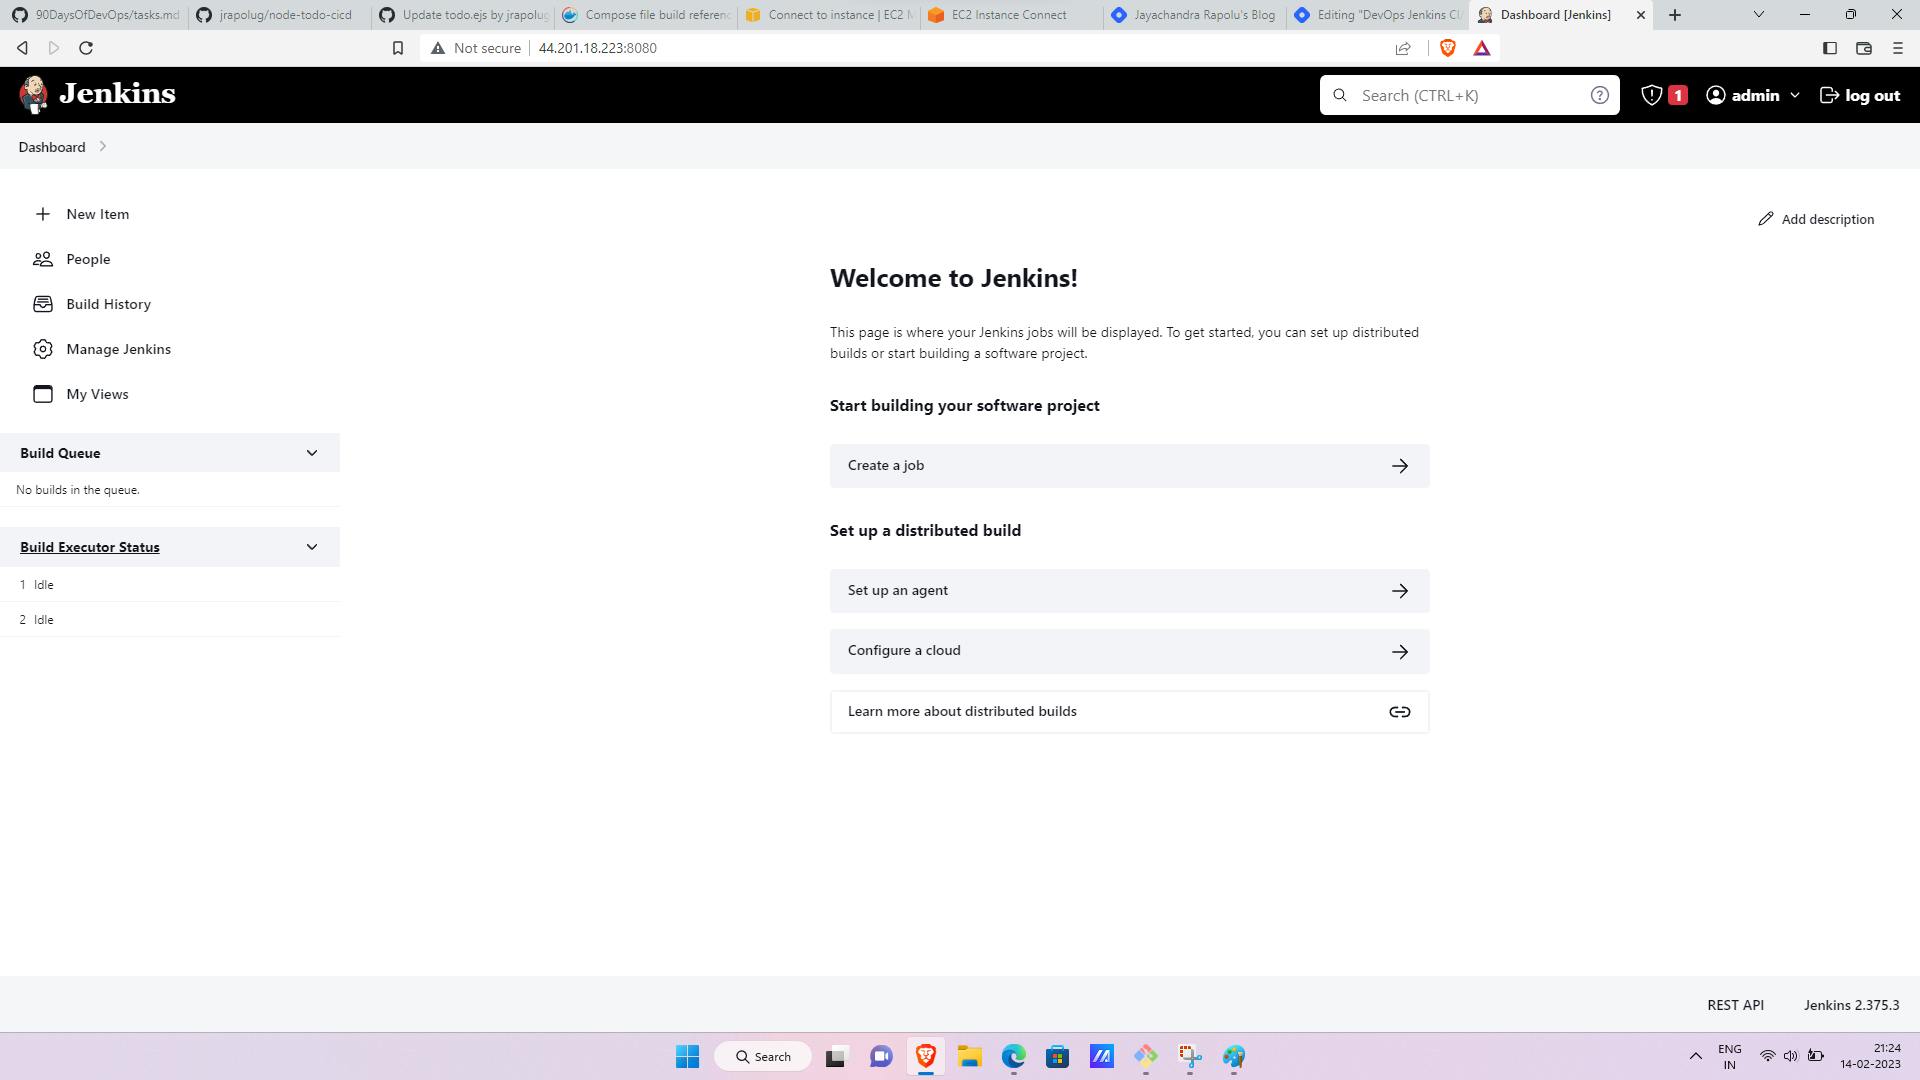
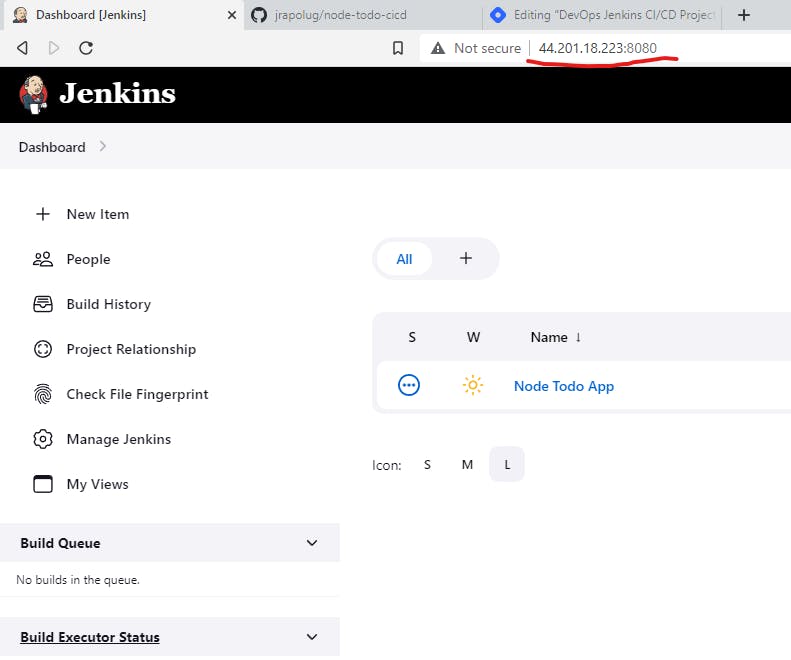
Now Launch Jenkins in the browser using publicip:8080 and set up Jenkins.
Select Install Suggested Plugins.
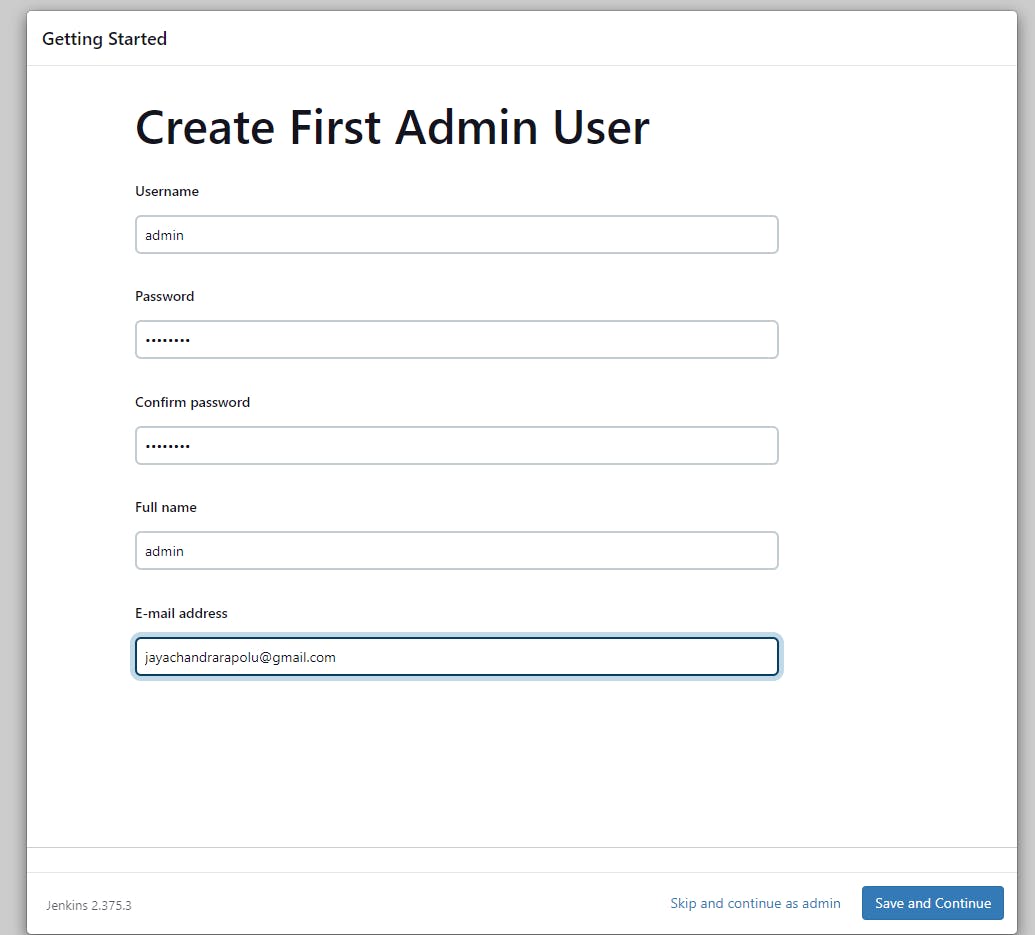
Create a User In Jenkins.
We have now successfully Installed our Jenkins on EC2.
  sudo apt update
  sudo apt install openjdk-11-jre -y
  curl -fsSL https://pkg.jenkins.io/debian-stable/jenkins.io.key | sudo tee \
    /usr/share/keyrings/jenkins-keyring.asc > /dev/null
  echo deb [signed-by=/usr/share/keyrings/jenkins-keyring.asc] \
    https://pkg.jenkins.io/debian-stable binary/ | sudo tee \
    /etc/apt/sources.list.d/jenkins.list > /dev/null
  sudo apt-get update
  sudo apt-get install jenkins -y
  Sudo systemctl enable jenkins
  sudo systemctl start jenkins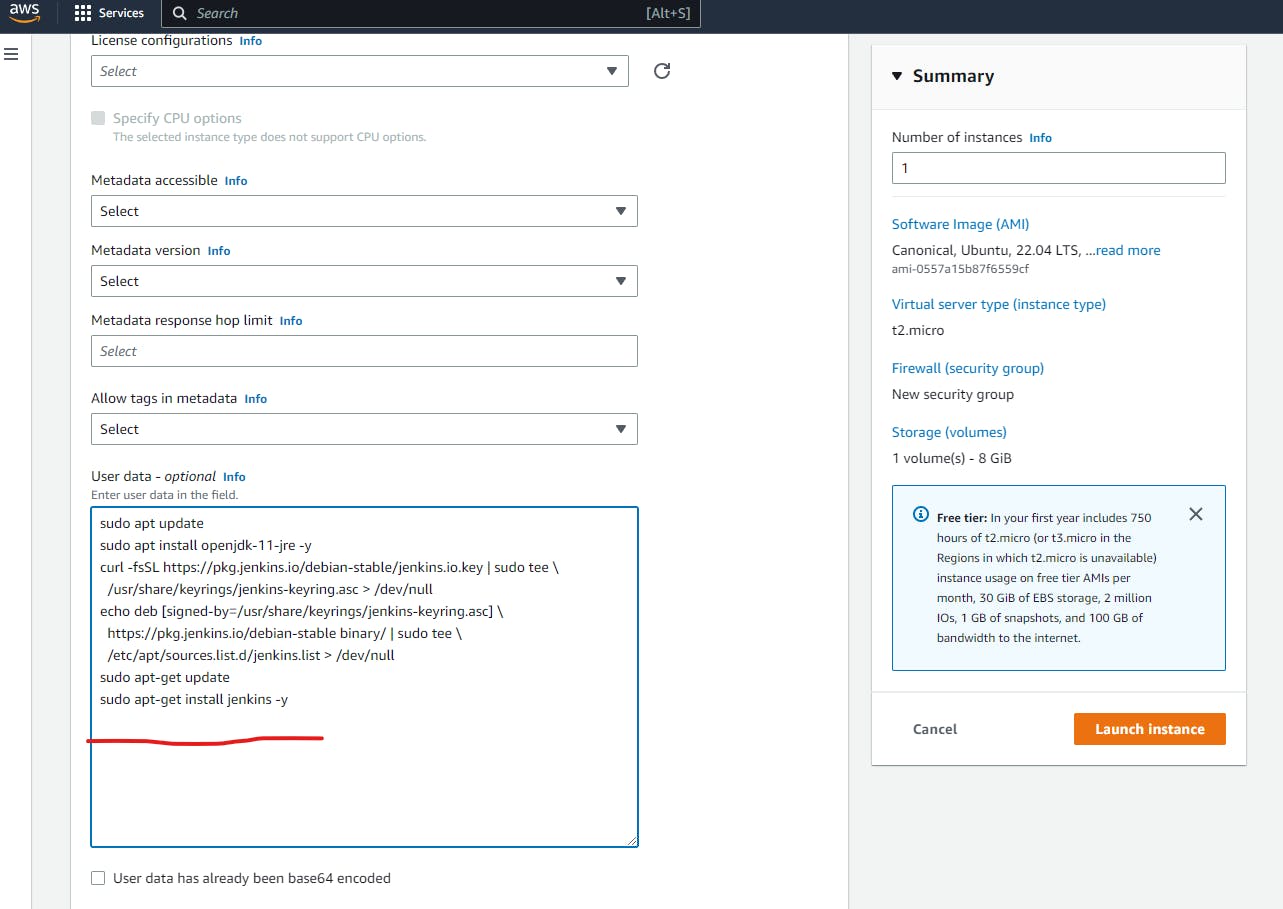

Now Create another EC2 Instance Install Java to Connect it to Jenkins and Install Docker.
Note: now you are familiar with Launching an EC2 Instance from the above process we will see how to install java and docker in the new Instance.
Install java 11 in the Instance using commands.
Install Docker using the below commands.
  sudo apt update
  sudo apt install openjdk-11-jre
sudo apt-get remove docker docker-engine docker.io containerd runc sudo apt-get update sudo apt-get install \ ca-certificates \ curl \ gnupg \ lsb-release sudo mkdir -m 0755 -p /etc/apt/keyrings curl -fsSL https://download.docker.com/linux/ubuntu/gpg | sudo gpg --dearmor -o /etc/apt/keyrings/docker.gpg echo \ "deb [arch=$(dpkg --print-architecture) signed-by=/etc/apt/keyrings/docker.gpg] https://download.docker.com/linux/ubuntu \ $(lsb_release -cs) stable" | sudo tee /etc/apt/sources.list.d/docker.list > /dev/null sudo apt-get update sudo apt-get install docker-ce docker-ce-cli containerd.io docker-buildx-plugin docker-compose-plugin
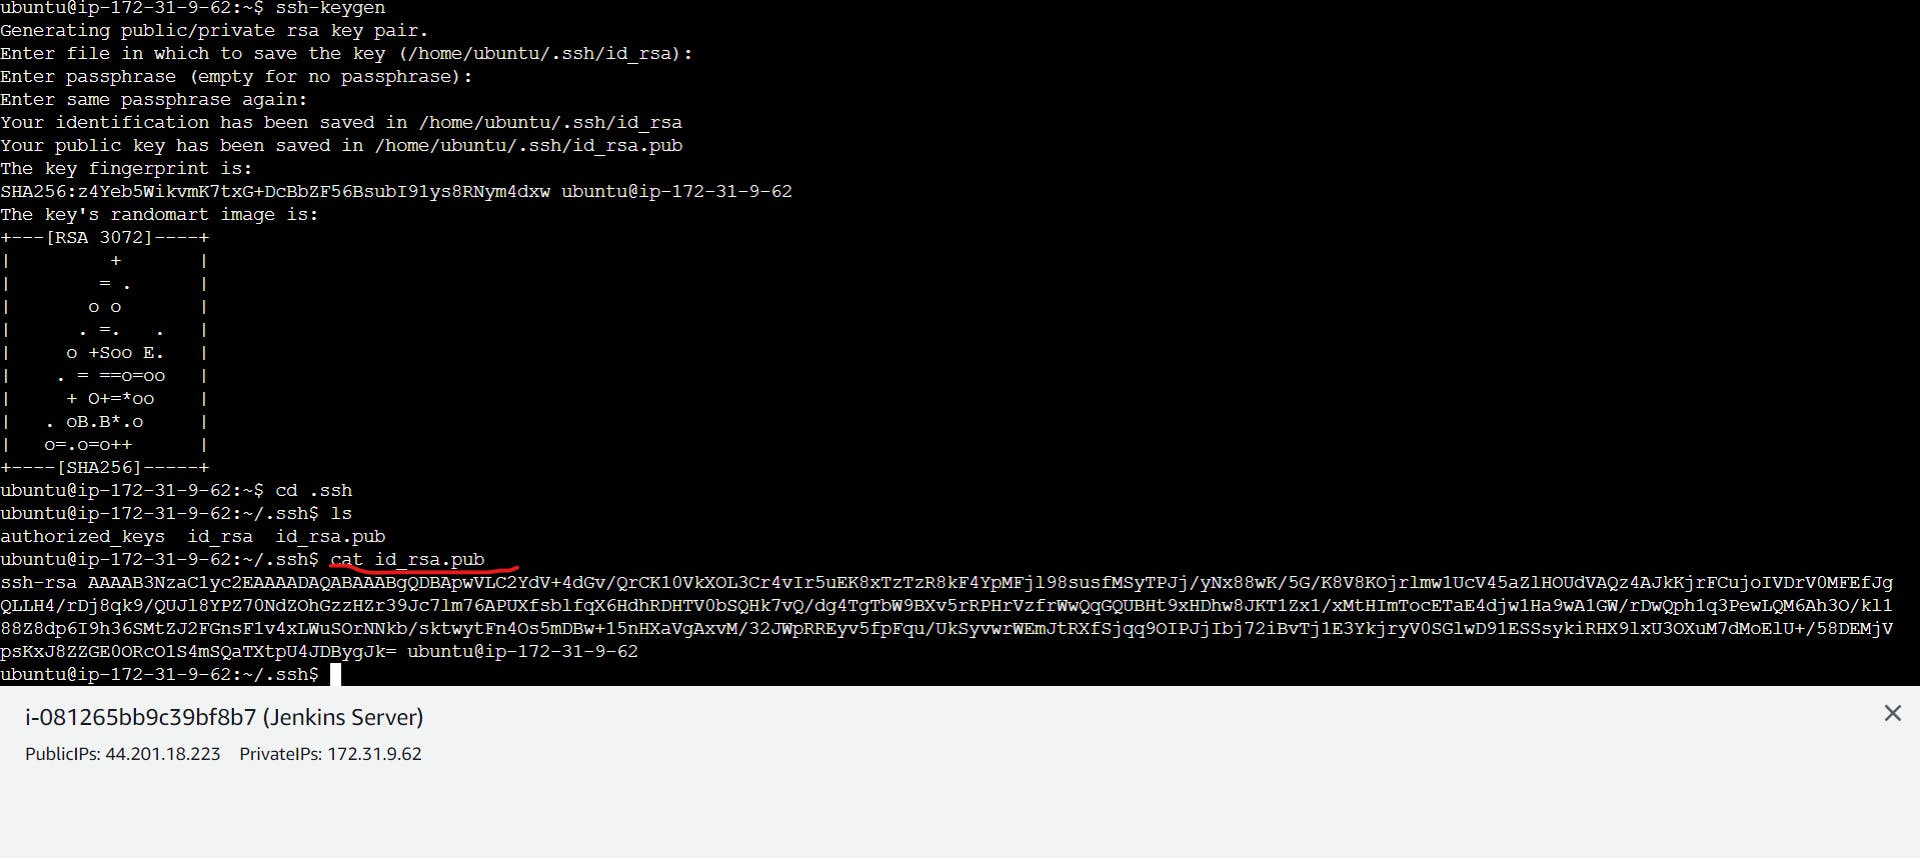
Now we will add Jenkins master public key to the Jenkins Agent ssh authorized_keys.
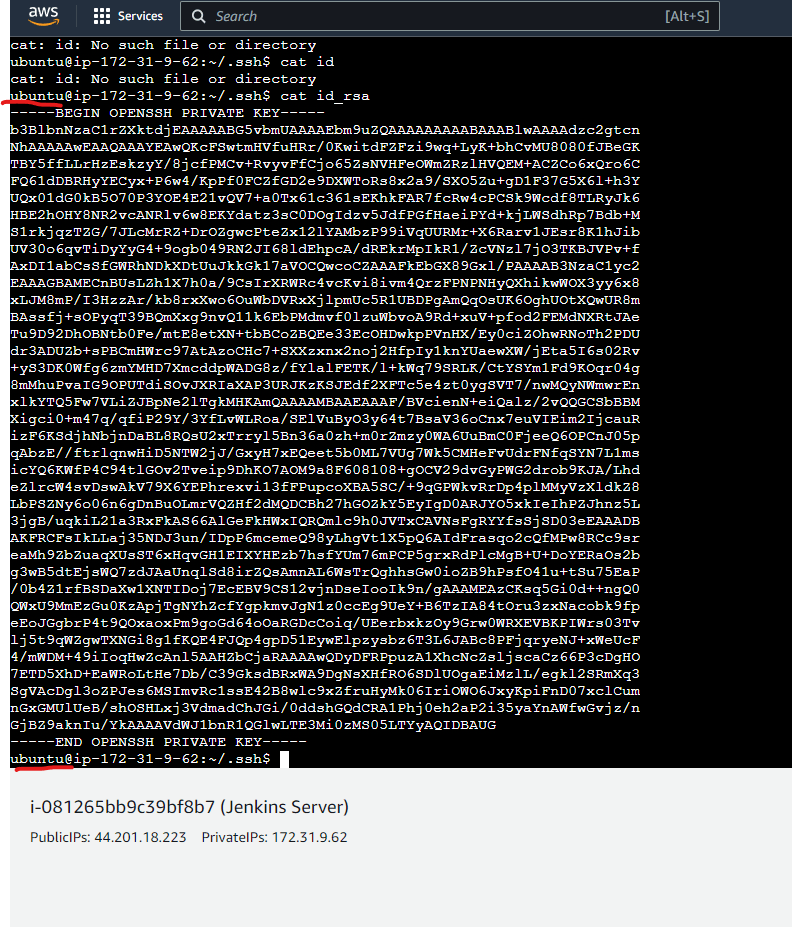
Open Jenkins master Server and run the ssh-keygen command to generate the public and private keys.
use cat .ssh/id_rsa.pub to get the public key.
Now copy that public key and paste it into authorised_keys in the .ssh directory of the agent server.
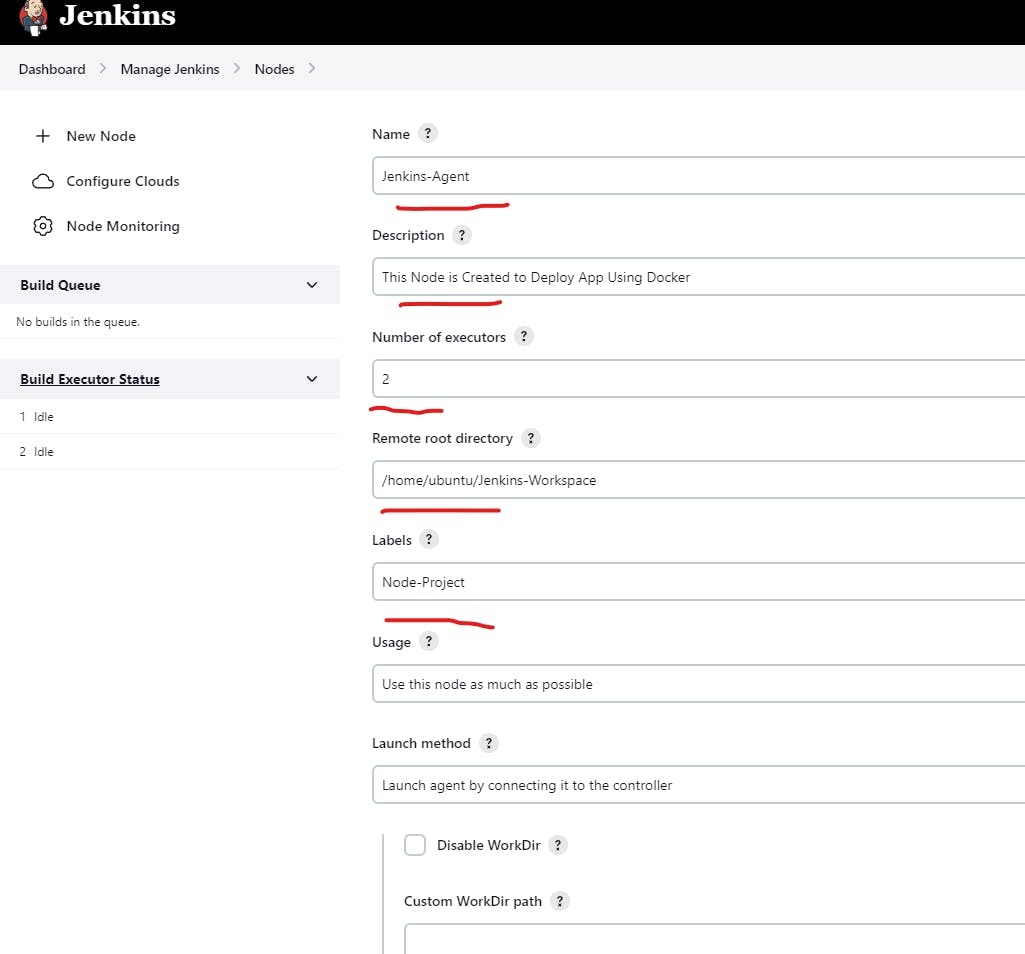
Now open Jenkins and go to Manage Jenkins and select Manage Nodes and cloud.
Select New Node and give Name to the Node and select permanent Node and Enter the following as per your requirements the 2 is the number of jobs you want to run at a time and the remote root directory is the path where you want to store data in the agent server.
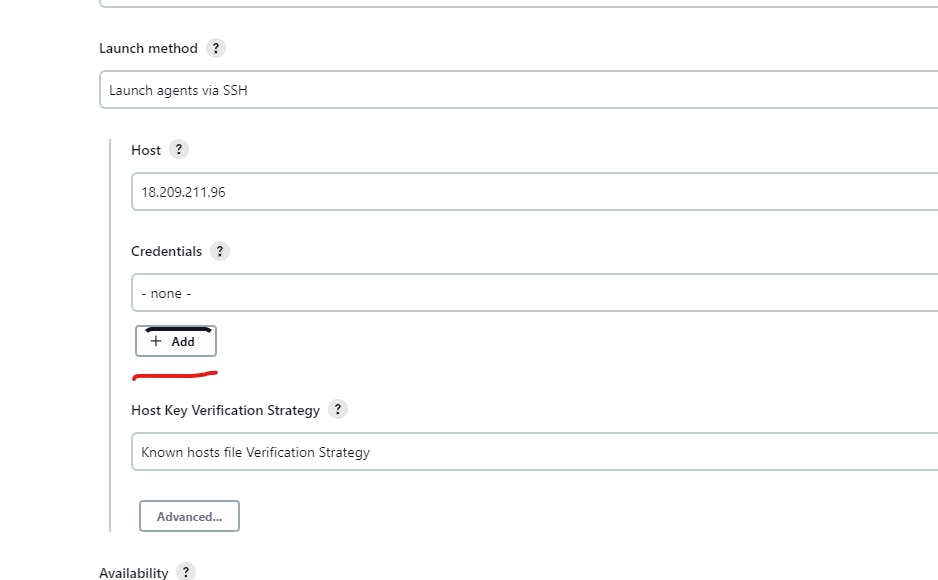
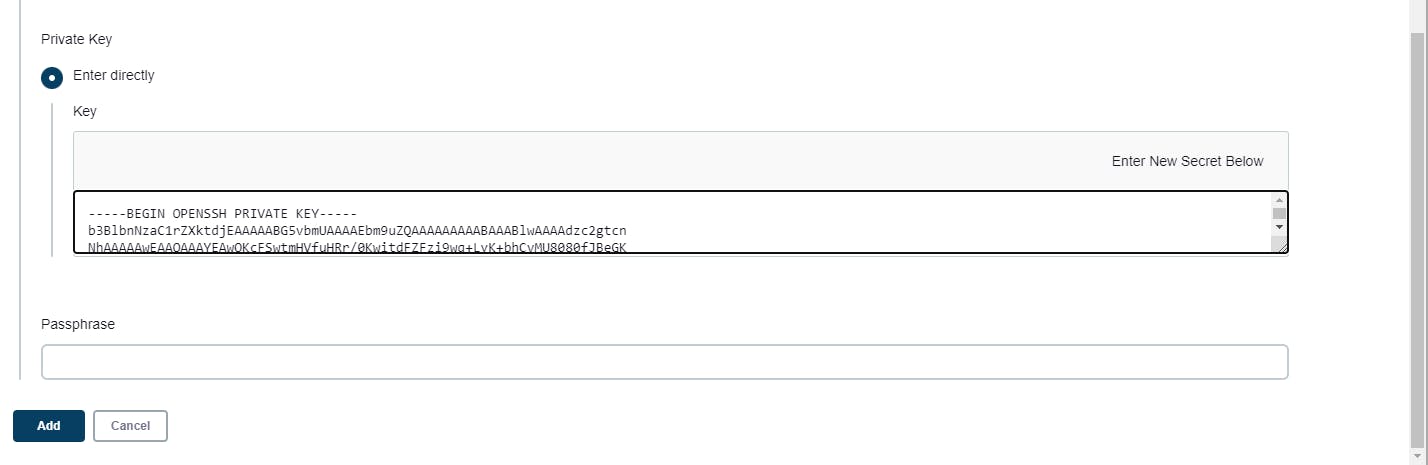
Now select Launch method as Launch via SSH and enter your agent public and select add credentials.
Now enter the id and description of your choice and give your Jenkins Master Instance Username and copy the id_rsa file in the .ssh directory in your Jenkins Master Instance as you can see I have entered my Jenkins Master Instance User id and private key to Jenkins and click on save.
Successfully connected our Jenkins agent with our master server now we will run our Docker application in Jenkins-Agent.


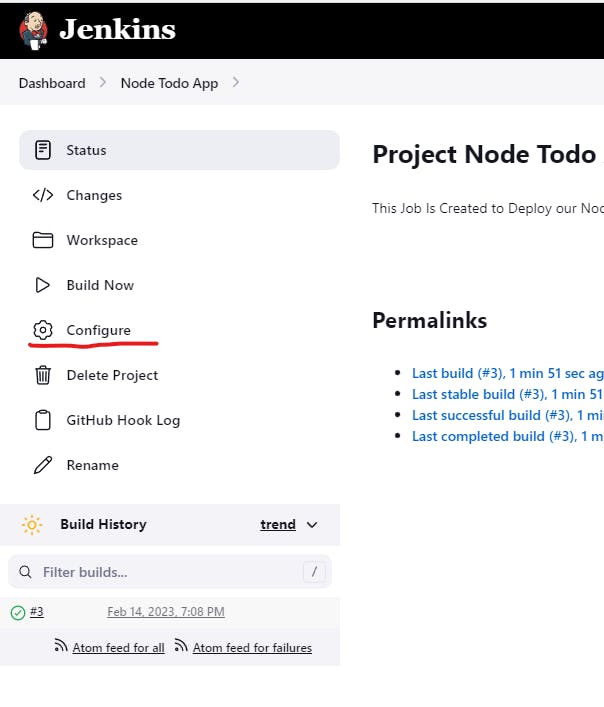
Now Let's Deploy Our Node-Todo App in our Jenkins Agent Server by creating a job.
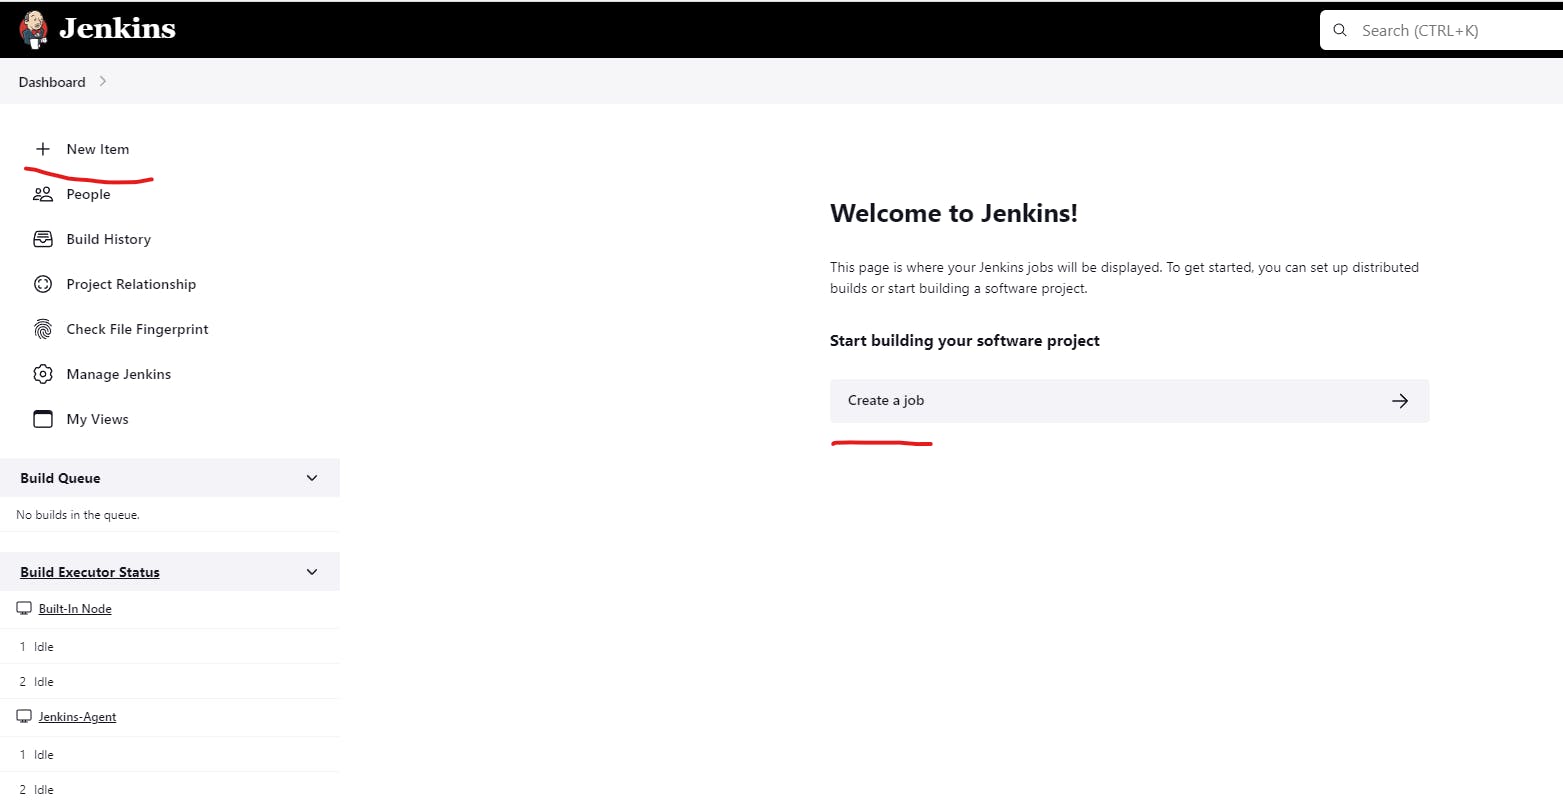
Select New Item
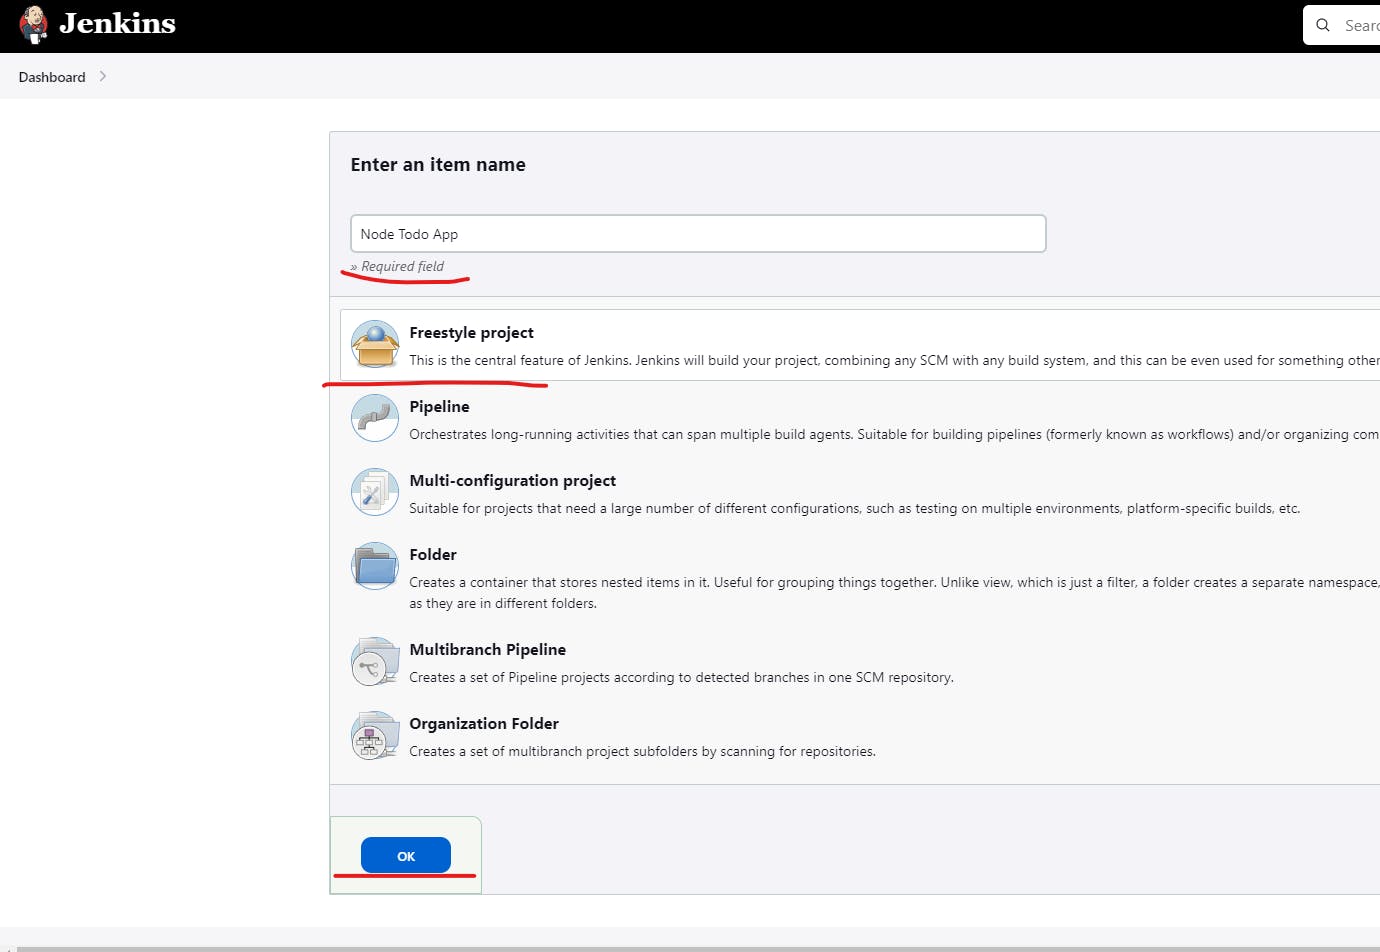
Enter a Name Select Freestyle Project
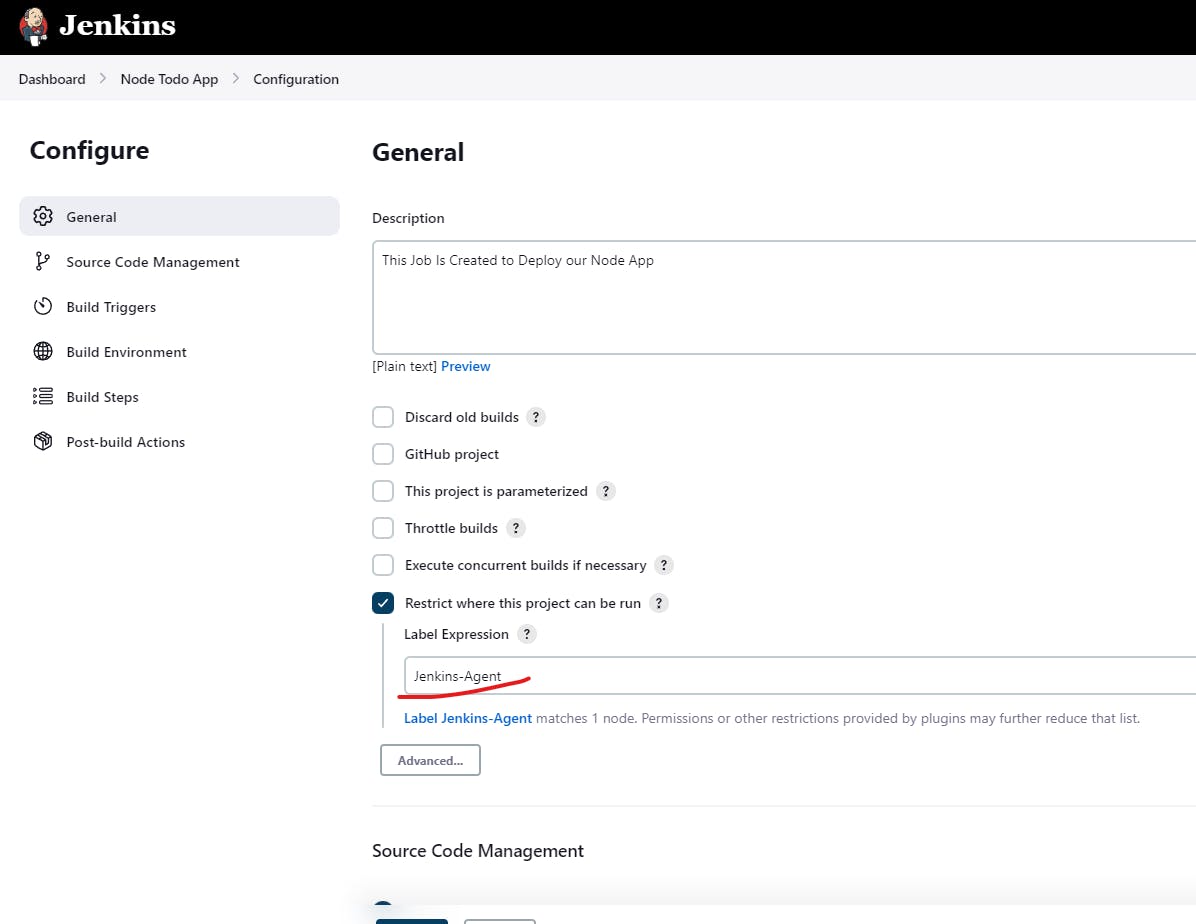
Now In General Restrict the Project to our Agent as we have installed docker on it.
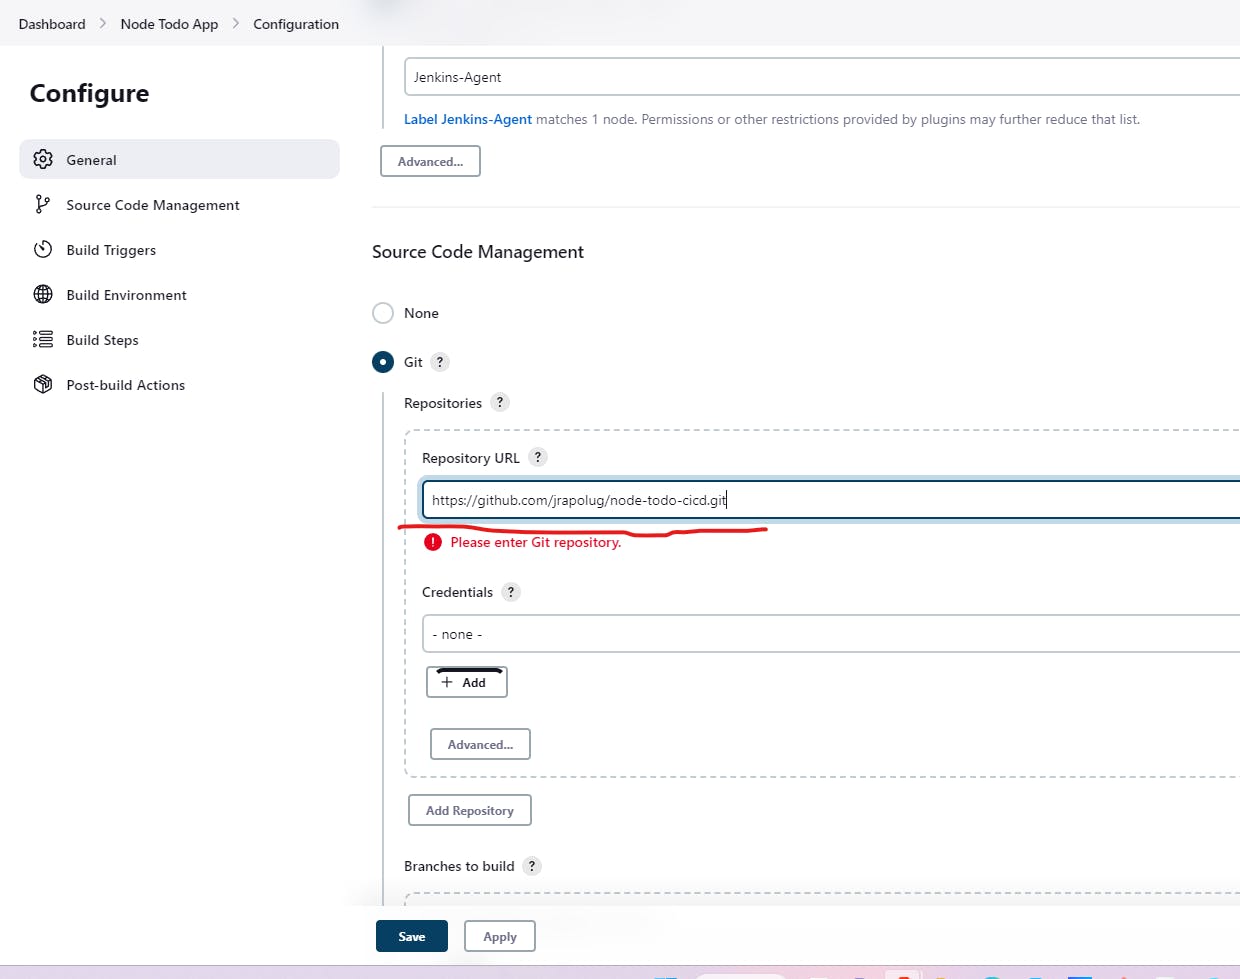
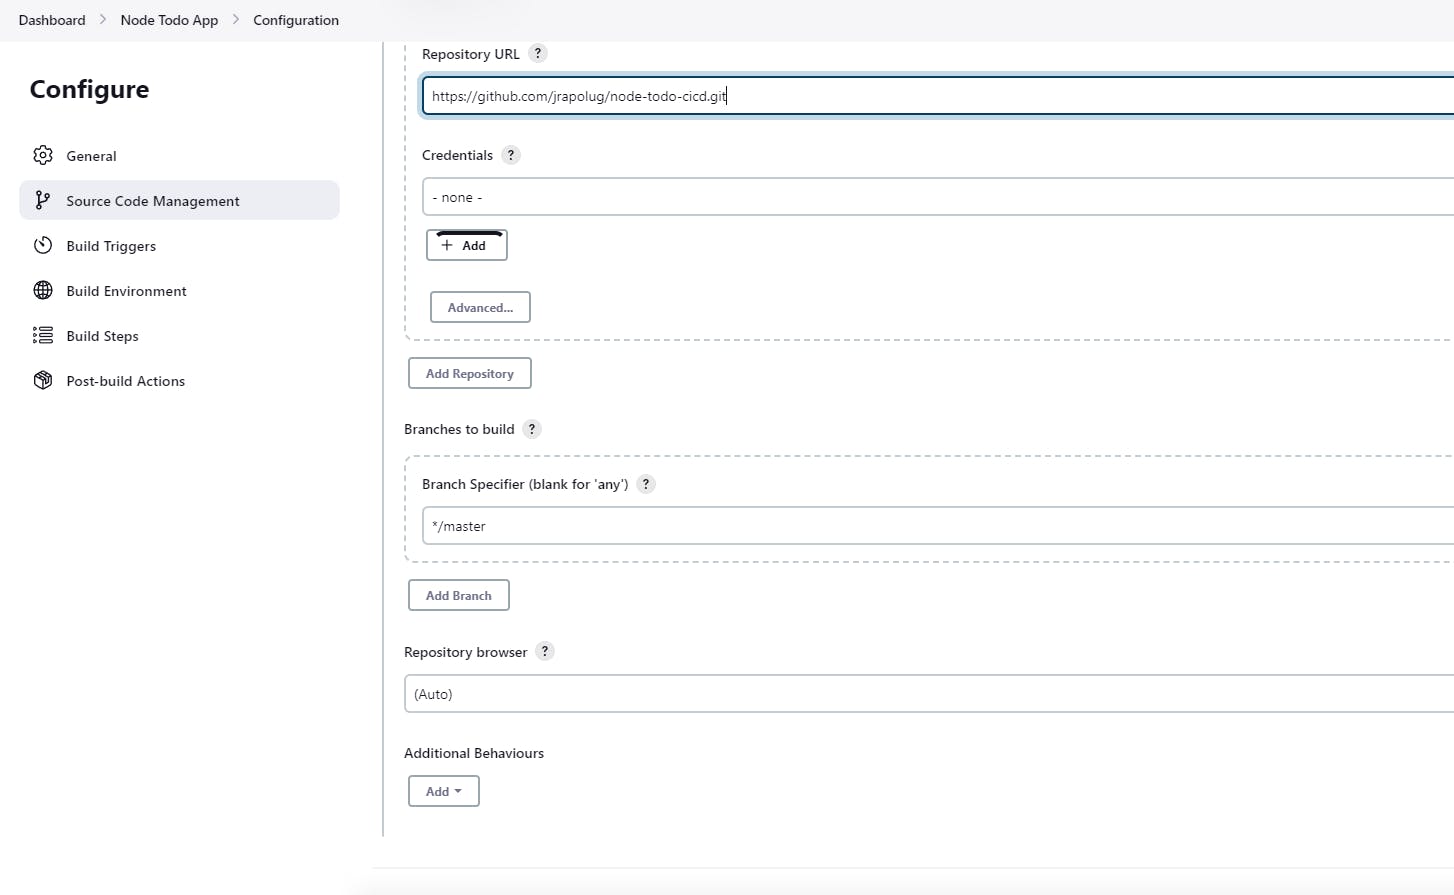
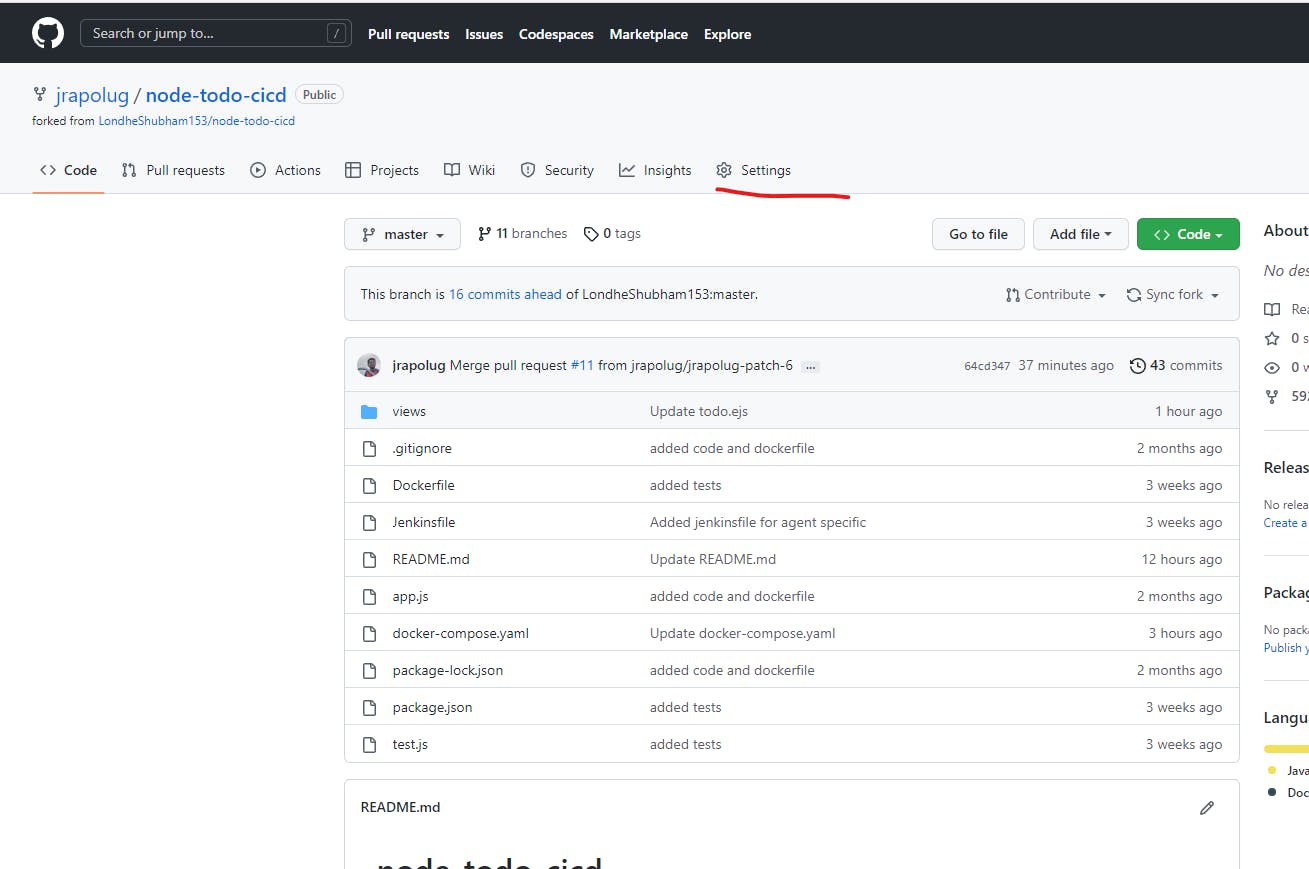
In Source Code Management fork my GitHub repo and paste it into the Repository Url.
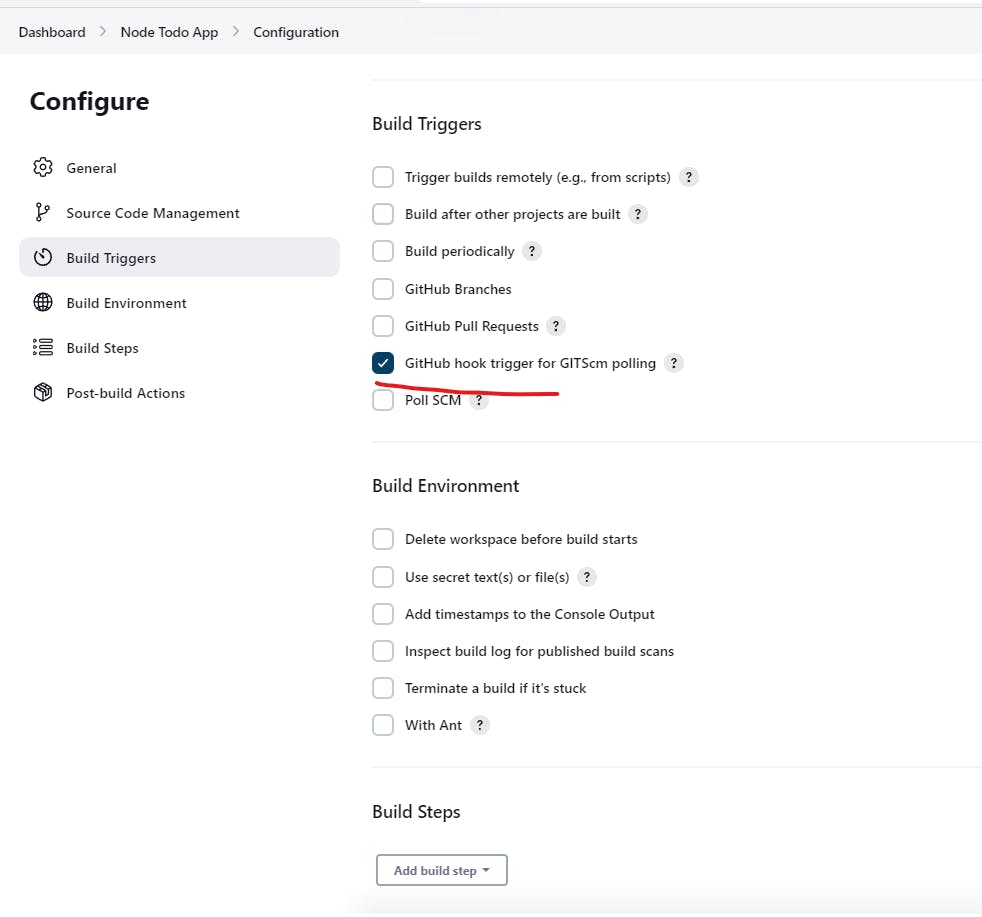
In the Build Triggers Section Select GitHub Webhook Polling.
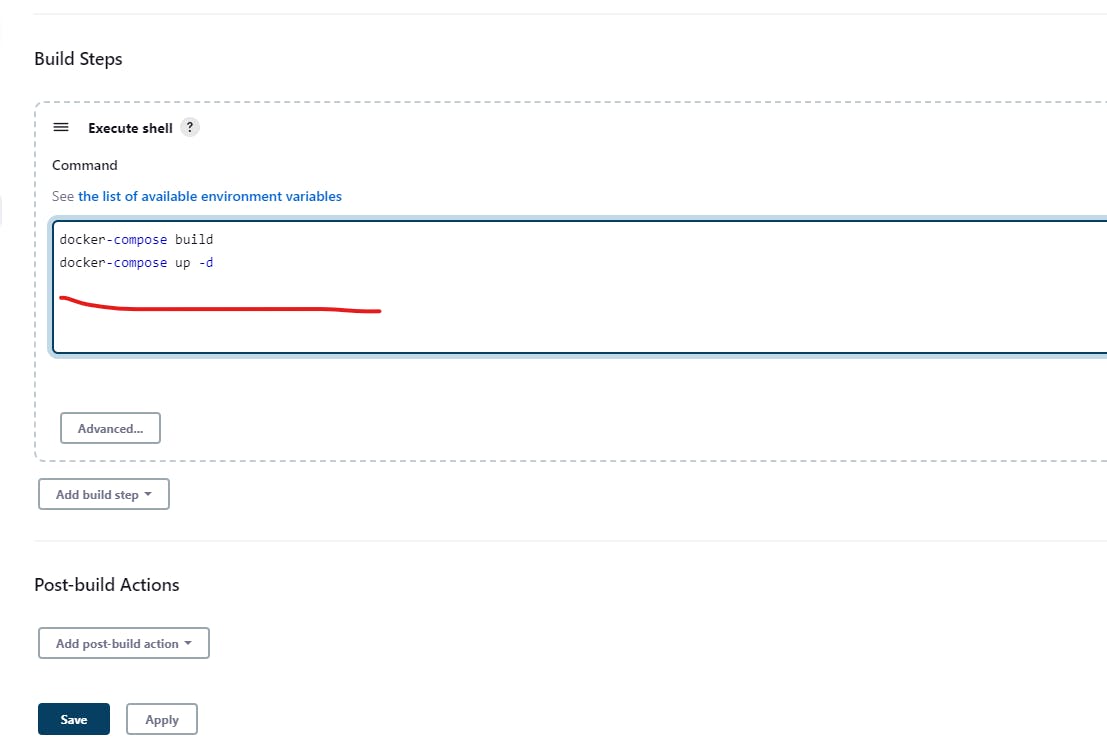
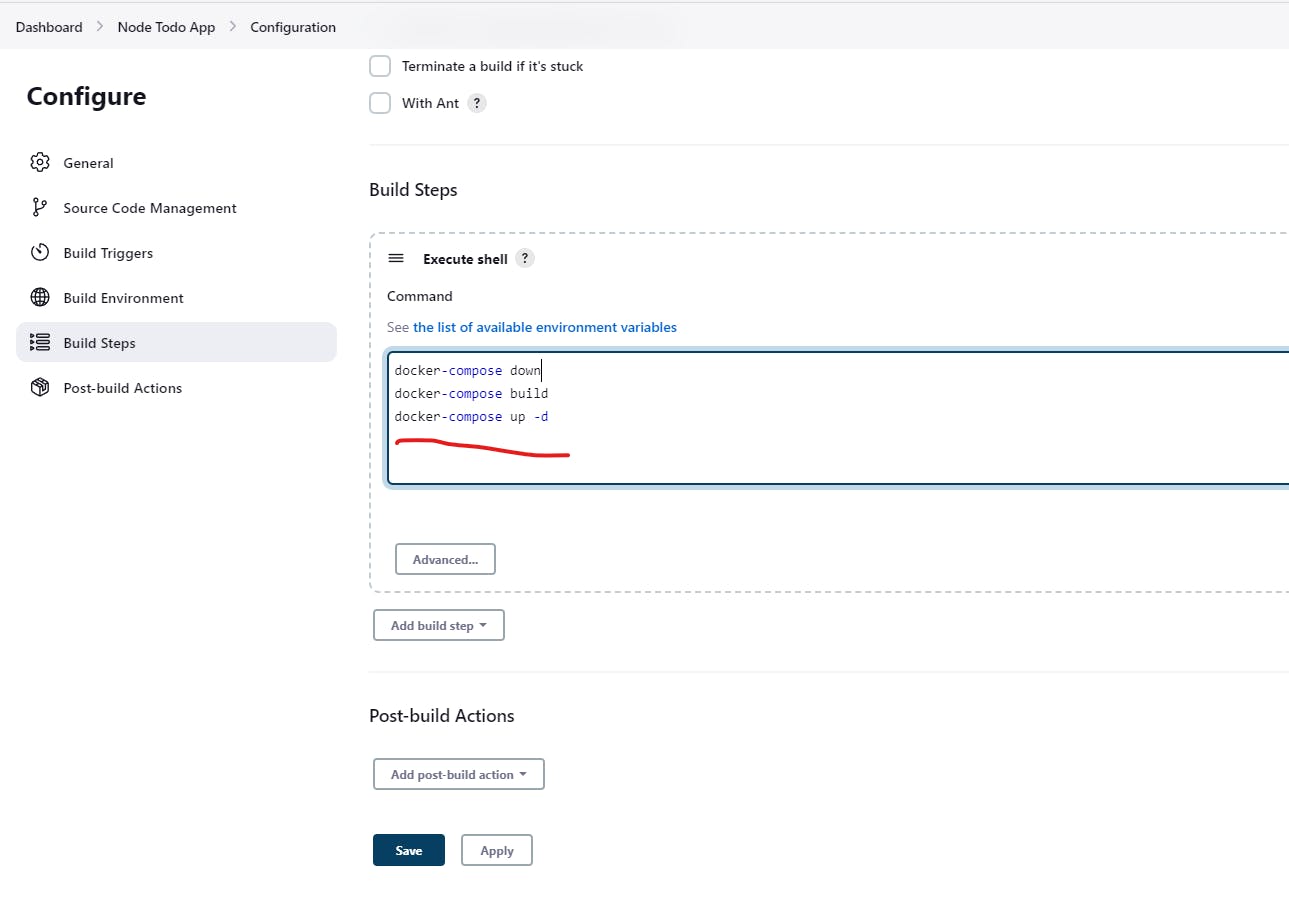
Finally, run Docker Compose commands in the build steps.
Now save the Job.
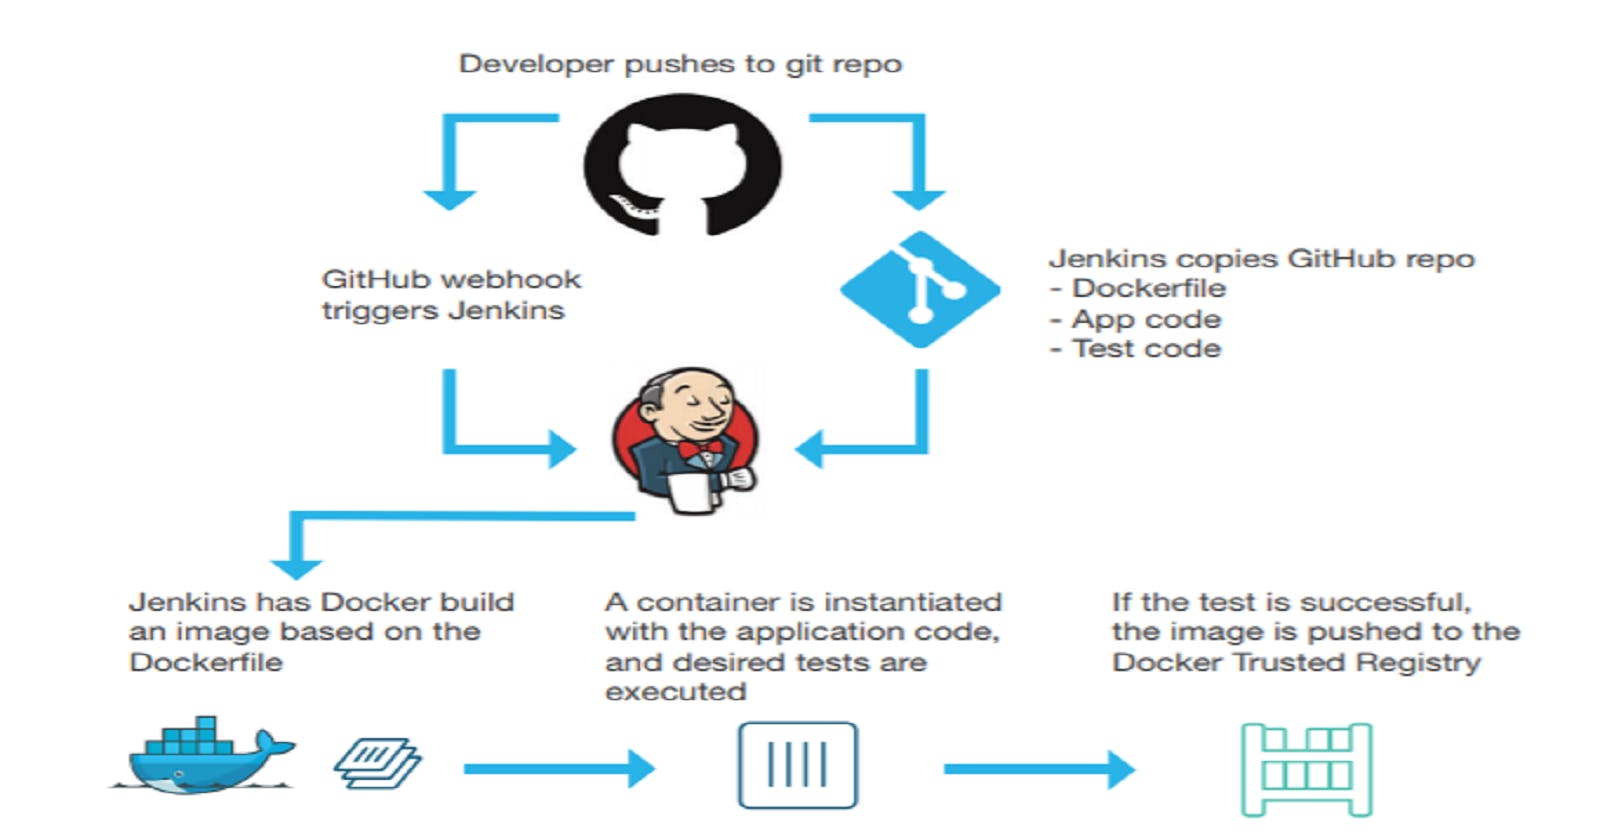
Attaching GitHub Repository to Job So that Jenkins will Automatically build the job whenever there is an event in or GitHub Repository.
Now we will Integrate the GitHub webhooks.
Copy Jenkins's web address.
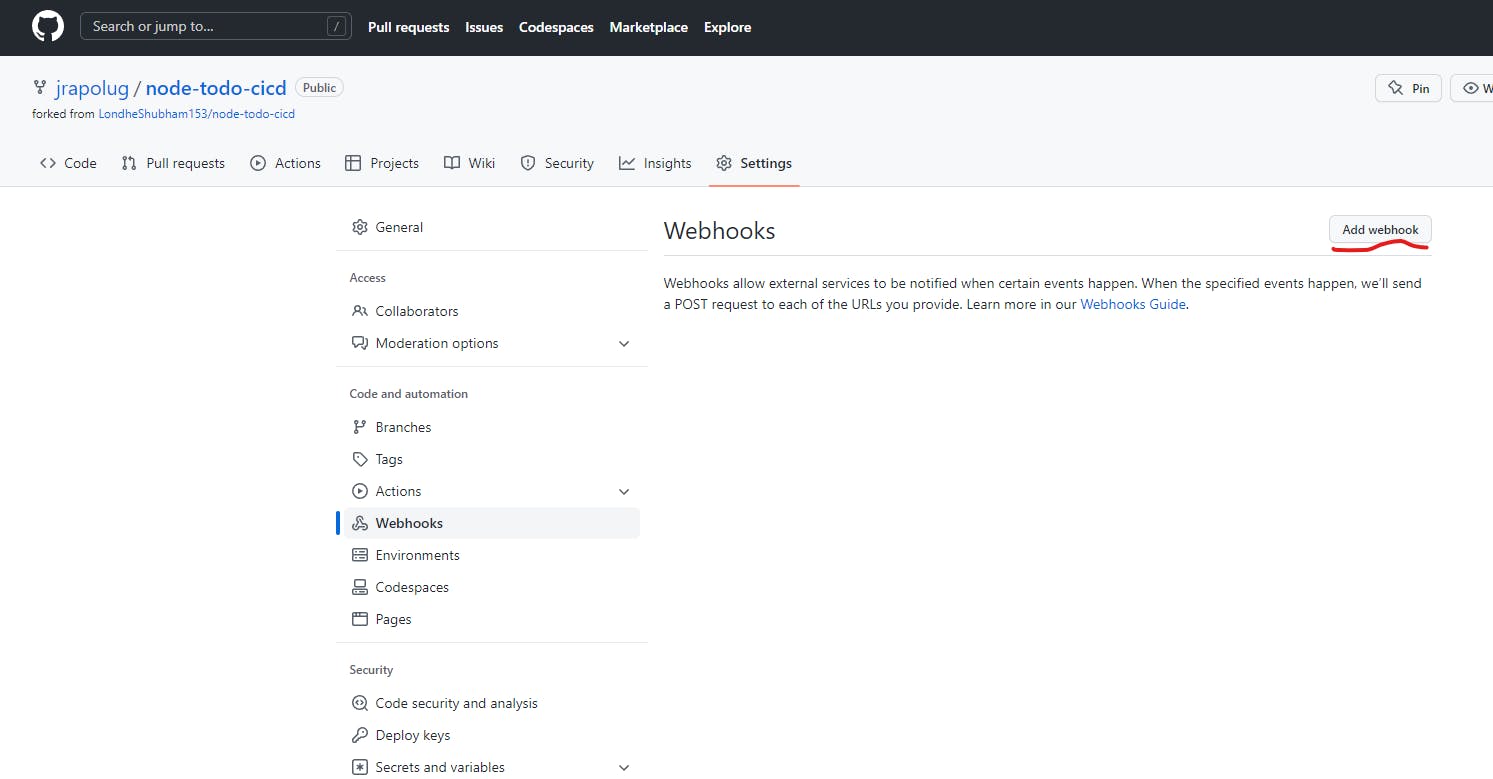
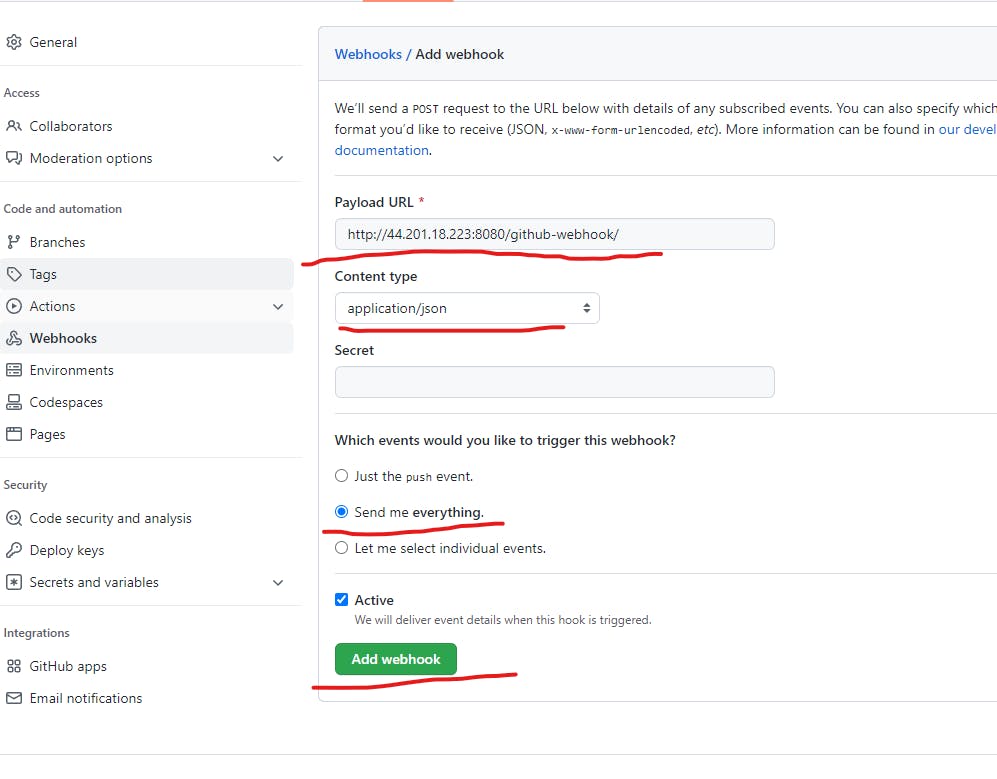
Go to your Github Repo and select settings.
In left section pane, you will find webhooks select and click on add webhook.
In Payload Url enter Jenkin's-webaddress/github-webhook.
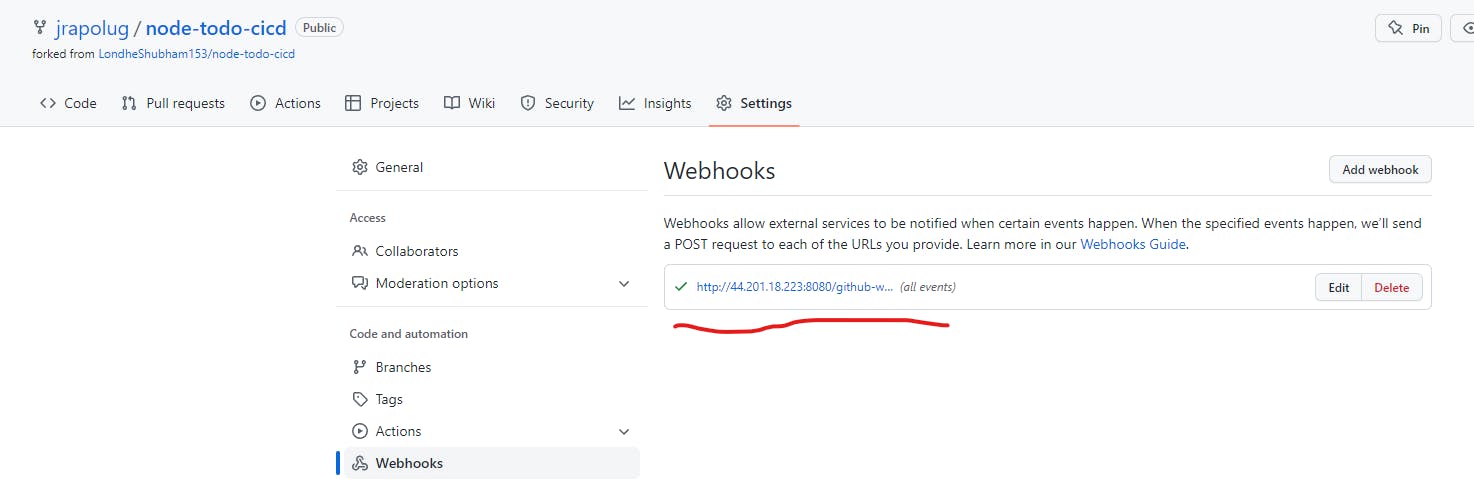
Now we have Successfully Configured GitHub Webhook whenever you make changes to the repository the job will create a new build automatically.
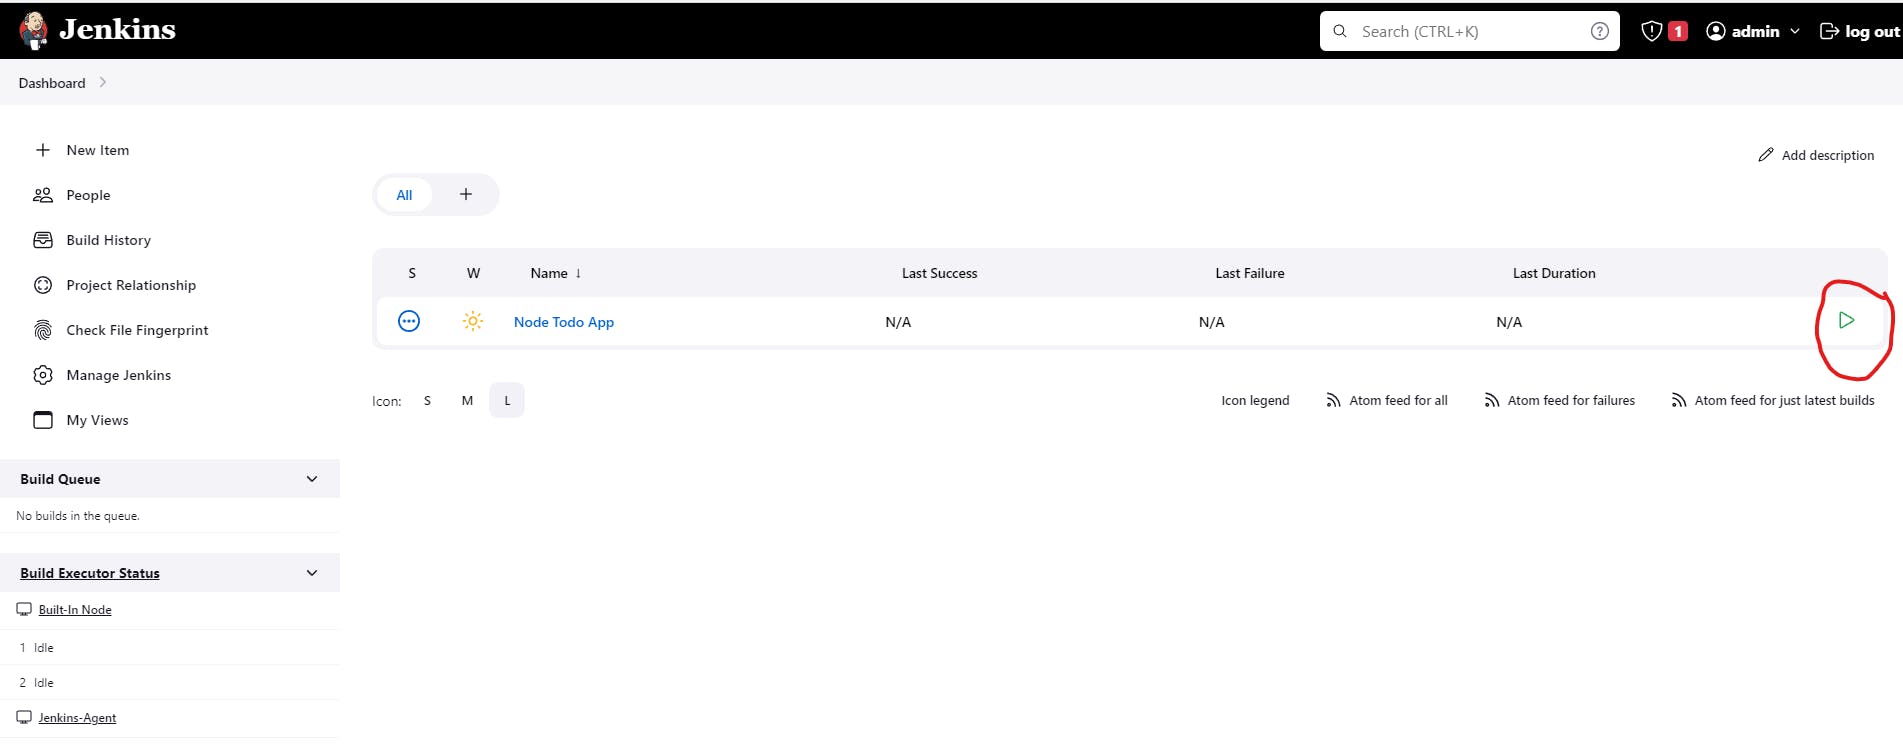
Now get back to Jenkins and click on build.
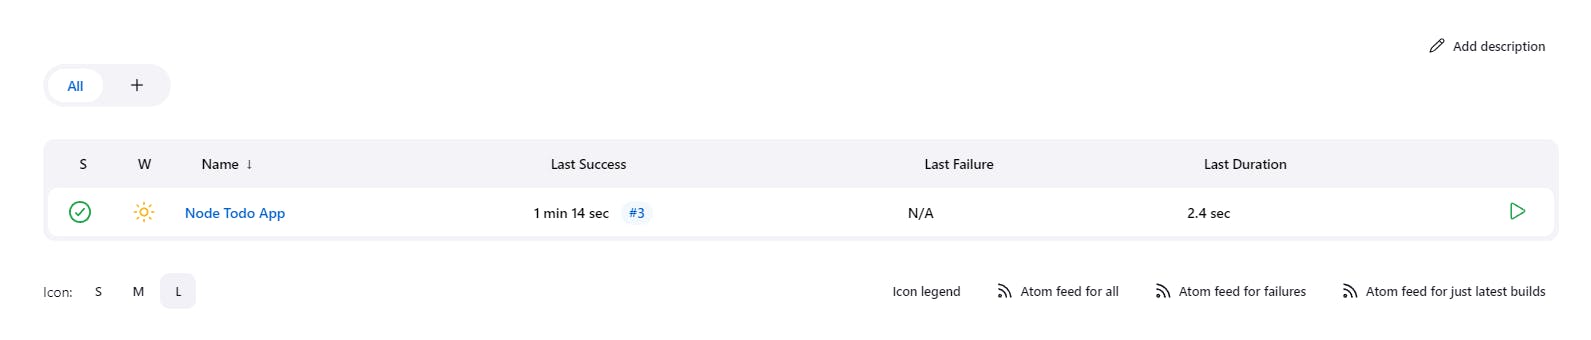
after completion of 1st build go to job and configure.
add docker-compose down command in build steps.
Now Save the Job.
Congratulations you have successfully completed a DevOps Project 👏👏🥳🎉🎉.
Summary of the Project.
we learned Jenkins Master-Slave Architecture Deployed an application using Docker Compose and created GitHub Webhooks to build jobs Automatically whenever there is an updated to the Repository by this you have learned Continous Integration as well.
Topics Covered:
Jenkins Master-Slave Architecture
GitHub Webhooks
Docker -Compose
Continuous Integration
Continuous Delivery
Continuous Deployment